Friday, March 13, 2009

Pecan snowballs (otherwise known as Mexican Wedding Cookies)


These are one of my favorite holiday cookies. They should be sweet, crumbly, and melt in your mouth. I know it doesn't make much sense to post about holiday cookies in March, but I can't help it if my cravings don't always follow the seasons! It's not my fault if they look like miniature snowmen.

I've eaten many different versions of these cookies, so I was curious to try Martha's version. Her recipe is very simple.

Ingredients:

1 cup (3 1/4 oz) pecans
2 cups powdered sugar
2 cups all-purpose flour
1/4 tsp salt
2 sticks unsalted butter, softened
1 tsp vanilla extract
1/2 tsp almond extract
Preheat the oven to 350 degrees and place oven racks in the upper and lower thirds of the oven. Line two baking sheets with parchment paper and set aside.

Grind the pecans and 1/4 cup powdered sugar in a good processor until the nuts are finely ground.


Whisk together the sugar-nut mixture, flour, and salt in a large bowl.


Using the paddle attachment of your stand mixture, cream the butter and 3/4 cup powdered sugar on medium speed until light and fluffy, about 4 minutes. Add the vanilla and almond extracts and beat until combined.

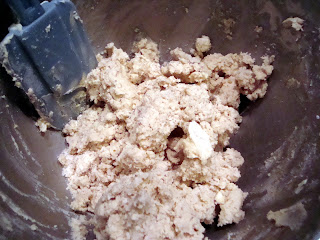
Add the flour-nut mixture and beat on low speed until everything starts to hold together.

Roll small pieces of dough into 1/2 - 3/4 inch balls and place them 2 inches apart on the baking sheets. Bake the cookies until they are lightly browned on the bottom but still light on top, approximately 10-12 minutes. Rotate the baking sheets (top to bottom and front to back) halfway through baking. The cookies may flatten slightly while baking.

Transfer the cookies to a wire rack to cool.
After the cookies have cooled completely, toss the cookies with 1 cup powdered sugar in a large bowl. Make sure the cookies are completely covered with sugar.

Enjoy!

Friday, March 6, 2009

Perfect Popovers (Part Deux)


Remember my first attempt at making popovers? To summarize: they were a minor disaster. Popovers should not deflate after you take them out of the oven!

I was determined to try to make these again. For my second attempt, I used the popover recipe from Martha's web site, which is slightly different than the one in her book. I had high hopes for this recipe, for a number of reasons. First, it uses fewer eggs. This is a good thing, because I thought my first batch of popovers tasted much too eggy. Second, the instructions involve baking the popovers at high heat for 15 minutes, and then lowering the temperature while continuing to bake the popovers for an additional 20 minutes. I've seen other popover recipes that employ this technique, so I thought there must be something to it.


I didn't take photos of the mixing and preparation steps this time, since everything looked pretty similar to my first popover post. In case you've forgotten, this is what a popover pan looks like. You can try to make popovers with a muffin pan, but they won't turn out as well.


I mixed the ingredients together, blah blah blah, and poured the batter into the popover tin.


After 35 minutes in the oven, I removed the popovers from the oven, slit them with a sharp knife to let the air escape, and removed them from the pan. And they didn't deflate! Woohoo!


Look, perfect popovers! They're light, fluffy, and golden brown, just like they should be!


Popovers should be very airy (almost hollow) on the inside, and these were no exception.


I am ridiculously happy with the way these turned out. With the right recipe and proper technique, these are actually very easy to make. They have very few ingredients, and most of them are things you probably already have in your pantry (well, except for the popover tin). If you've had trouble making these in the past, I highly recommend this recipe. Traditionally, popovers were eaten with butter and jam, but I think popovers make a great alternative to regular bread. They are a tasty accompaniment to winter soups or stews (or pretty much anything else).

Perfect Popovers (makes 6)

Ingredients:
1 tablespoon unsalted butter, melted
1 cup all-purpose flour
1/2 teaspoon table salt
2 large eggs
1 1/4 cups whole milk
Instructions:

Preheat oven to 450 degrees.

Liberally spray popover tin with non-stick cooking spray, and then lightly coat with flour.

Whisk together the flour and salt in a large bowl. In a separate bowl, whisk the eggs, milk, and butter. Pour the egg mixture over the flour mixture and fold together until the entire mixture is just blended. It's OK if there are a few small lumps of flour left in the batter.

Evenly distribute the batter between the 6 popover cups.

Bake at 450 degrees for 15 minutes. Reduce the temperature for 350 degrees and bake until the popovers are puffy and well-browned on top, approximately 20 minutes. Warning: if you take them out of the oven too early, they will deflate. Remove tin from the oven and immediately remove popovers onto a wire cooling rack. Use a sharp knife to cut a small slit in the sides of each popover (this prevents them from getting soggy or deflating). Serve immediately.

Wednesday, February 25, 2009

Chocolate Cupcakes with Raspberry Buttercream


I've been a bad, bad blogger. I don't have a good excuse why I stopped blogging in November. I made tons of baked goodies for the holidays, and the backlog for my blog kept growing. But I'm back! Even better, I've realized that I can publish recipes as long as I write my own text. Whee!

I love cupcakes, and I also love the combination of chocolate and raspberry. Martha Stewart has a great, easy recipe for one-bowl chocolate cupcakes, but I didn't want to do the typical thing with chocolate frosting. I found Martha's recipe for strawberry buttercream, and I decided to adapt it to raspberry buttercream. It turned out wonderfully!

Cupcake Ingredients:

3/4 cup unsweetened cocoa powder (NOT dutch-process)
1 1/2 cups all-purpose flour
1 1/2 cups sugar
1 1/2 teaspoons baking soda
3/4 teaspoon baking powder
3/4 teaspoon salt
2 large eggs
3/4 cup warm water
3/4 cup buttermilk
3 tablespoons vegetable oil
1 teaspoon pure vanilla extract

Instructions:

Preheat your oven to 350 degrees.

In a large bowl, sift together all of the dry ingredients (cocoa powder, flour, sugar, baking powder, baking soda, salt).


Add the eggs, water, buttermilk, oil, and vanilla extract. Mix everything together by hand until the batter is smooth, approximately 3 minutes.


Pour the batter evenly into the cups of a regular muffin tin lined with paper liners (if you don't have paper liners, butter the tins so your muffins won't stick). Bake for 20 minutes, or until a toothpick inserted into the center of the muffins comes out with only a few crumbs attached.


Let the muffins cool completely on a wire rack before you frost them. This is what the muffins looked like when I took them out of the oven:


Now it's time to make the buttercream! This is an unusual buttercream recipe, because it calls for egg whites instead of egg yolks. It's very good though.

Raspberry Meringue Buttercream Ingredients:

4 large egg whites
1 1/4 cups sugar
1 1/2 cups (3 sticks) unsalted butter, room temperature, cut into tablespoons
1 teaspoon pure vanilla extract
1 1/2 cups (12 ounces) raspberry jam

Instructions:

First, puree the raspberry jam in a food processor until it is completely smooth. If the jam has seeds, make sure the seeds have been pulverized.

Combine the egg whites and sugar in the bowl of your electric mixer. Place the bowl over a saucepan of simmering water and whisk constantly, until the sugar completely dissolves and the mixture is warm to the touch.


Attach the bowl to your stand mixer (with the whisk attachment) and beat on high speed until stiff peaks appear. Continue beating until the mixture is fluffy and has cooled. This should take approximately 5-6 minutes.

Remove the whisk attachment from your mixer, and add the paddle attachment. Turn the mixer on medium-low speed and slowly add the butter, one tablespoon at a time, beating well. After all of the butter is incorporated, add the vanilla extract. Turn the speed to low and beat for 2 additional minutes.

Add the pureed raspberry jam to the mixture, and combine with a spatula until smooth.

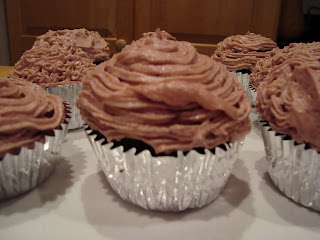
Now you have raspberry meringue buttercream! You can use a spatula or knife to spread the frosting on top of the cupcakes, but I wanted to do something a little more decorative.
I cut a corner off of a large ziploc bag and attached a star-shaped decorative icing tip. I filled the bag with the buttercream and iced my cupcakes with some simple stars and lines.

These cupcakes were very pretty, and also very tasty. I love the color of the raspberry buttercream. Yum!


Sunday, November 23, 2008

Pumpkin Pie with Gingersnap Crust


Every year, I bake a pumpkin pie for my family's Thanksgiving Dinner. In my world, it's not really Thanksgiving unless you have pumpkin pie. I often experiment with the type of pie I make, and this year, I decided to make a pumpkin pie with a gingersnap crust. I absolutely love ginger, and I think pumpkin and ginger taste great together.

I used Martha Stewart's pumpkin pie recipe. I also modified a recipe that I found for a graham cracker crust, but I substituted gingersnaps instead of the graham crackers. I guessed that they would be interchangeable, and based on my results, I think this substitution worked wonderfully.

Gingersnap Crust

Ingredients:

5 oz. gingersnaps, crushed (I prefer the Triple Gingersnaps from Trader Joe's or the 365 brand from Whole Foods. Both have great ginger flavor.)
5 TBSP melted butter
3 TBSP sugar

Directions:

Pulse the gingersnaps in the bowl of a food processor until they resemble coarse crumbs.


Add the butter and sugar, and pulse until the mixture becomes clumpy and starts to stick together.


Using a rubber spatula, spread the gingersnap mixture evenly over the bottom and sides of a 9-inch pie plate. Bake at 350 degrees until edges of crust turn golden brown, 12 to 14 minutes.


Now we move on to the pie filling. Pumpkin pie is incredibly easy, because you mix all of the ingredients together in one bowl. Whisk until smooth.


Pour the filling into your crust, make sure it's spread out evenly, and then bake. Voila! Pumpkin pie!


For some reason, my photos of this pie didn't turn out very well, but I promise it's delicious! The pie filling is a fairly traditional one, but the addition of the gingersnap crust gave it a nice kick of flavor. This is a great recipe if you want a traditional pie with a slight twist.

Thursday, November 20, 2008

Pumpkin Whoopie Pies

Life has gotten very busy lately, so I've been neglecting my blog. I hope to rectify this with some new posts over the next few days. Sorry!

Recently, I've seen a lot of people blogging and talking about making Pumpkin Whoopie Pies, which are kind of like pumpkin moon pies. This seems to be the trendy home baking dessert of the season. They sounded great to me, so I thought I'd give them a shot for a work potluck.

Martha Stewart has a recipe for Pumpkin Whoopie Pies on her web site, but her recipe involves chocolate cakes and pumpkin filling, which isn't what I wanted. I wanted to make a version with pumpkin cakes and cream cheese frosting. A friend sent me another recipe, which sounded like what I wanted. I adapted it slightly, and I'm excited that I can actually post a full recipe here!

Ingredients:

1 1/2 sticks (6 ounces) unsalted butter, 1 stick melted, 1/2 stick softened
1 cup packed light brown sugar
2 large eggs, at room temperature, lightly beaten
1 cup canned pure pumpkin puree (NOT pumpkin pie filling)
1 teaspoon cinnamon
1/2 teaspoon ground nutmeg
1/2 teaspoon ground cloves
1/2 teaspoon ground allspice
1/2 teaspoon ground ginger
1 1/2 teaspoons pure vanilla extract
1 teaspoon baking powder
1 teaspoon baking soda
3/4 teaspoon plus 2 pinches salt
1 2/3 cups flour
4 ounces cream cheese, chilled
1 cup confectioners' sugar

Directions:

1. Preheat the oven to 350°. Line two baking sheets with parchment paper.

2. In a medium bowl, whisk together the flour, baking soda, and baking powder.

3. In a large bowl, whisk together the melted butter and brown sugar until smooth. Whisk in the eggs, pumpkin puree, spices, 1 teaspoon vanilla, and 3/4 teaspoon salt. Using a rubber spatula, fold in the flour mixture.

3. Using an ice cream scoop or tablespoon, drop 12 generous mounds of batter, spaced evenly, onto each baking sheet. Bake until springy to the touch, about 10 minutes. Transfer to a rack to cool completely.

4. Meanwhile, using an electric mixer, cream the softened butter with the cream cheese. Add the confectioners' sugar and the remaining 2 pinches salt and 1/2 teaspoon vanilla; mix on low speed until blended, then beat on medium-high speed until fluffy, about 2 minutes.

5. Spread the flat side of 12 cakes with the cream cheese frosting. Top each with another cake.

Now for the step-by-step procedure with photos:

First, I mixed together the melted butter and brown sugar until smooth.

Then I whisked in the eggs, 1 teaspoon vanilla, and 3/4 teaspoon salt.


I added the spices and pumpkin, which made the batter much thicker.


Then I folded my flour mixture (which also included baking powder and baking soda) into the liquid batter.

Step One:

Step 2 (with the flour half-way mixed in):


Step 3, with the flour completely incorporated:


I spooned the small cakes onto a baking sheet lined with parchment paper.


And this is what they looked like when they came out of the oven.


While the cakes were cooling, I made the filling. First, I mixed together the butter and cream cheese.


Then I added the confectioner's sugar. Mmmm... creamy.


I added a generous amount of filling to the bottom half of 12 cakes, and then topped them with another cake. There was a lot of cream cheese frosting, so I didn't have to skimp.


These were fun, very tasty, and also easy to make. I would definitely make these again!

Tuesday, November 4, 2008

Ebony and Ivory (aka Black and White cookies)


Ebony and ivory/live together in perfect harmony/side by side on my piano...


I asked my husband to pick his Top 3 cookie recipes from Martha's Baking Handbook, and he immediately chose the Black and White Cookie. He grudgingly found two other possibilities, but he was practically giddy with excitement over these cookies, so I decided to be nice and make them for him.


My only knowledge of Black and White Cookies comes from the infamous Seinfeld episode where Jerry and the gang visit a bakery to buy a hostess gift for a party they are attending. Elaine almost kills a woman over a chocolate babka, and Jerry finds comfort in a Black and White Cookie (which, ironically, eventually makes him sick). Hopefully these cookies will have better karma than Jerry's.


I started by making the cookie dough. I whisked together the dry ingredients (flour, baking soda, salt) in a large bowl.


Next, I creamed the butter and sugar together, using my stand mixer.


Nice and fluffy!


I added the eggs, one at a time, and then the vanilla extract. I blended them until they were well-incorporated and the batter was creamy.


Finally, I added the flour mixture and some heavy cream. You know a recipe is going to be good when it involves heavy cream.


The batter tasted okay (yes, I always taste my batter... don't you?) It tasted like typical sugar cookie dough. I'd never tried Black and White cookies before, so I wasn't sure what to expect.

Per Martha's instructions, I formed the dough into small balls and placed them on cookie sheets to bake in the oven.


After my first batch, I realized the cookies didn't flatten very much during baking, so I needed to form the dough into a disk-like shape before baking them. Unfortunately, I didn't take another photo of them after I started doing this, but I basically just flattened out the balls of dough I made the first time.

Per Martha's instructions, I took them out of the oven when the edges were ever-so-slightly browned. My husband supported these instructions, because he said the cookies were supposed to be cake-like.

My dog REALLY wanted a cookie. (She also desperately needed a hair cut. She could have claimed the title of The Shaggy Dog when this photo was taken. Don't worry, she's gotten a hair cut since then.)


After I baked the cookies, I realized that they didn't look as perfectly round as the ones in Martha's photos, and I knew I should have used a cookie cutter (this isn't part of her recipe). So I decided to improvise, and I decided to make slightly more perfectly round cookies by cutting my cookies with a round biscuit cutter. You can also see a photo of Martha's cookies in the background of this photo.


At this point, I ate some of the cookie scraps (it was my duty to test them), and I was slightly underwhelmed. They tasted like plain sugar cookies, and I'm not a huge fan of plain sugar cookies. I wasn't sure if this project was going to be worth it in the end, but I forged ahead. My husband, on the other hand, thought the cookies tasted perfect at this stage.

While the cookies were cooling, it was time to make the icing. The icing was very simple - just heavy cream and powdered sugar for the white icing, and then you add dutch-process cocoa powder to make the chocolate icing.

First, I sifted the powdered sugar into a large bowl. This frosting used a lot of powdered sugar. Like a whole box worth. There was powdered sugar all over the place by the time I finished this!


I whisked the heavy cream into the sugar until it was smooth. This frosting was VERY sweet.


I poured half of the white icing into a second bowl, so I could turn it into chocolate. I added a healthy amount of cocoa powder, and voila - chocolate frosting! This was DELISH, by the way. I had a little extra, and I'm saving it for some other purpose. Like maybe eating it with a spoon.


Side note: I had to use some cookie scraps to make an Obama cookie. Mmm edible politics.


Where was I? Oh yes, icing. I started with the white icing. I used an offset spatula to frost the cookies. I folded a piece of parchment paper in half, so it had a straight edge on one side, and I flattened it over half of the cookie, in an attempt to try to form a relatively straight line in the middle of the cookies. Then I frosted the side that wasn't covered by parchment paper. They aren't perfect, but I think I did a pretty good job.

You may notice that one of the cookies in this photo is completely covered in white icing. There was another cookie that fell into the bowl of chocolate icing, so it was completely covered in dark brown frosting. I called it The Augustus Gloop Cookie.


After the white icing had dried, I frosted the other side with chocolate.


I think they turned out pretty darn well, if I do say so myself. They were a pain to make, but they look pretty good. And now I'm a Black and White cookie convert. They are delicious! The icing definitely adds a lot to the cookie, especially on the chocolate side. I could eat a dozen of these with no problem.


Saturday, November 1, 2008

Pumpkin Cupcake-Muffins

I call this recipe Pumpkin Cupcake-Muffins, because I was trying to create something that was dense and moist like a muffin, but slightly decadent, like a cake. I was making these for a weekend brunch, so I wanted them to be more appropriate for breakfast than for dessert. My vision was to make individual pumpkin treats that had a layer of cream cheese inside, instead of on top, of the muffin.

This is one of those recipes that sounded good in theory, but didn't work out quite the way I had hoped. But in the end, they turned out great after I did some improvisational tweaking.

Martha Stewart has a great recipe for pumpkin cupcakes (minus the cream cheese) on her web site. This is the basic recipe that I used for the cakes.

I started by whisking together the flour, baking soda, baking powder, salt, and spices in a large bowl.
Next, I used an electric hand mixer to beat together the sugar, eggs, and canola oil (I substituted 1/2 cup oil instead of the butter in Martha's recipe, because I wanted these to resemble pumpkin muffins instead of cupcakes). I also added some molasses for flavor. Normally I would've used my stand mixer for this, but I was trying to keep it clean so I could use it to make the cream cheese layer.
This is what the mixture looked like after I mixed everything together. After creaming the eggs, sugar, and oil, I added the pumpkin puree, and then folded in the flour mixture. I forgot to take a photo of this step (sorry)!
Now I had to figure out how to make the cream cheese layer. I ended up using this recipe:

Cream Cheese Layer:
9 ounces cream cheese, at room temperature
¼ cup granulated sugar
¼ cup brown sugar
6 TBSP real maple syrup
1 tsp maple extract
1 TBSP all-purpose flour
1 large egg

Beat all ingredients together for 2 minutes until smooth and creamy.

This is what the ingredients looked like before:
And after:In retrospect, I think this mixture needed to be a LOT thicker. Maybe there was too much maple sugar. Maybe I should have creamed the cream cheese, sugar, and eggs together first, so they could have become lighter and fluffier. The mixture tasted good, but the texture was wrong. Nevertheless, I marched onward.

I tried to layer the cupcake/muffins with a layer of pumpkin cake on the bottom, topped with a layer of the cream cheese mixture, and then another layer of pumpkin cake on top. This didn't work out so well, because the cake mixture was MUCH thicker than the cream cheese layer, so it kind of collapsed. See what I mean?I didn't give up though. I decided to go ahead and bake them, and I crossed my fingers that they would turn out well. They actually baked up fine, although the cream cheese mixture completely blended with the pumpkin cake, and they ended up looking like this.They didn't have a defining cream cheese layer, which I thought was necessary for flavor contrast. So, I decided to whip up a pumpkin cream cheese frosting to put on top of the cakes.

Pumpkin Cream Cheese Frosting:
6 oz. cream cheese
1/4 cup pumpkin butter (I bought this from Trader Joe's)
1/4 cup confectioner's sugar
Beat all ingredients together on medium speed for 3-4 minutes until light and fluffy.

This frosting was INCREDIBLE, by the way. I love pumpkin and cream cheese. This would make a great cake frosting.

Because of the additional frosting, these ended up resembling cupcakes more than muffins, but they were still delicious!

Friday, October 24, 2008

Buttermilk Biscuits


On a cool fall day, what's better than a hearty bowl of soup paired with warm, fluffy, fresh-from-the-oven buttermilk biscuits? These are quick and easy to whip up for a weeknight dinner, and they're much tastier than the instant-mix versions (Bisquick, I'm looking at you).

In the interest of full disclosure, I based my biscuits on Alton Brown's recipe, not Martha's. Mr. Judge insisted that Alton has the Best. Biscuit. Recipe. Ever., and he insisted that I try his recipe first. Sorry, Martha! I'll try your recipe next time.

Technically, I used the recipe from Alton's baking book, not the recipe on the Food Network site. The recipes are similar, but slightly different.

As usual, the first step was to mix together the dry ingredients (flour, baking soda, baking powder, and salt). Alton's recipe included the unique step of using a box grater to grate the butter into the dry ingredients. He thinks this is easier than the usual method of using a pastry blender to cut the butter into the flour.


Next, he recommends rubbing the butter into the flour with your fingers, until half of it is integrated with the flour, and the rest of the butter is pea-sized (or smaller).


The recipe in his baking book uses only butter, not shortening.
Next, it was time to combine the liquid ingredients. Alton's recipe calls for buttermilk and yogurt, which is kind of unusual (most biscuit recipes don't include yogurt). Apparently the yogurt adds extra moistness and a nice tang. His recipe specifically states that you cannot use fat-free yogurt, which is what I usually buy. I knew my husband had recently picked up some yogurt at the store, so I asked him what kind it was. He assured me it was whole-milk yogurt, because he would never buy skim yogurt. So, I looked in the fridge, and guess what I found?


D'oh! But instead of giving up, I decided to forge ahead with the fat-free yogurt and hope for the best. I decided if the biscuits didn't work out, I would blame the yogurt first, and my husband second.

I mixed together the liquid ingredients (buttermilk, yogurt, and one egg).


Then I added the flour mixture to the buttermilk mixture. This formed a very gloopy, lumpy batter.


I turned the batter out onto some parchment paper before kneading, because I knew this would be an extremely sticky process.


Instead of "kneading" the dough, I used Alton's suggestion of folding it three times, kind of like a tri-fold wallet. This is what it looked like after the third fold.

I flattened the dough to about a one-inch thickness, and I used a 2-inch round biscuit cutter to cut out the individual biscuits. They were very sticky, and my hands were covered with dough, so I couldn't take a good photo of them during this stage.


I placed the biscuits on a baking sheet and put them in the oven.

Twenty minutes later, I had warm, fluffy biscuits. They were moist and buttery on the inside, and crusty brown on the outside. Mmmmm yum.

This is how I like to eat them - with a nice pat of butter on top. They're also very tasty with pumpkin butter (which is how I ate them for breakfast the next day).


Alton Brown's recipe was a success, and I'm going to try Martha's recipe next time. Either way, I highly recommend making your own biscuits from scratch. The small effort involved is well worth the result.

Friday, October 17, 2008

Miniature Gingerbread Cakes

I was invited to attend a Fall Baking potluck brunch last weekend, and I wanted to take something seasonal and festive. I had a feeling there would be a lot of apple and pumpkin treats, so I decided to be a rebel and make these gingerbread cakes. Aren't they cute? Ginger is one of my favorite foods, so this was perfect for me. This also gave me an opportunity to use my decorative mini-muffin tins for the first time. This means they were a good investment, right?

As usual, I used the recipe from my copy of Martha's Baking Handbook, but I think this is the identical recipe on Martha's web site.

I made some slight modifications to her original recipe. Her recipe calls for mixing together one cup of boiling water and 2 teaspoons baking soda, setting them aside, and then adding them into the batter as one of the final steps. I've never heard of doing this before. I spent some time searching the internet, trying to figure out what kind of magical chemical reaction occurs when you mix together boiling water and baking soda. I couldn't find anything useful related to cake baking (although I did find a lot of recipes for polishing silver). So, in my infinite wisdom, I decided to skip this step entirely. I added the baking soda to the rest of the dry ingredients, and instead of adding one cup of water to the batter, I substituted one cup of milk. I thought this would give the cakes a richer flavor. Did it work? Stay tuned....

First, I sifted together the dry ingredients (flour, baking soda, baking powder, salt, spices) into a large bowl.


Then I creamed the butter and brown sugar together in my stand mixer.
See, nice and fluffy. I added molasses, freshly grated ginger (key ingredient!), eggs, and milk to the butter/sugar mixture. Then I added the flour mixture to the rest of the cake batter. When everything was mixed together, I poured the batter into my cute little cake tin. Correction: my heavily greased cute little cake tin. I was really worried about the batter sticking to my molds, so I used a lot of non-stick spray on these babies.

After 15 minutes in the oven, they were perfectly baked.

I carefully flipped over my cake tin, and they came out of the molds perfectly!

The recipe in Martha's book involves covering the tops of the cake with chocolate ganache. That sounds amazingly good, but I thought it would be a bit heavy for a brunch, so I decided to dust the tops of the cakes with powdered sugar instead. The sugar also emphasized the different shapes of each cake.

Perfect for the holidays! And so tasty, too. I really loved these. They have a very strong ginger flavor, which I love. They also freeze very well, if you wrap them up individually in plastic wrap.

Thursday, October 9, 2008

Fresh Strawberry Scones

I found some great strawberries on sale at my local market, which is a rare treat for October. I usually try to eat produce in season, but these were so irresistible! I bought two pounds of berries, and I decided to use half of them for baking. I wanted to try something a little different, so I flipped through Martha's Baking book until inspiration struck me. Scones! I love scones, but I've never made them before, and I've never tried strawberry scones.

Martha's Book includes three different recipes for scones, but none of them use fresh fruit. I had a feeling there would be some major differences in the moisture content with dried vs. fresh fruit, and I wasn't sure if wanted to "wing it" by myself. Luckily, one of my favorite food bloggers, Katie at Good Things Catered, published a great recipe for fresh strawberry scones. I decided to adapt her recipe for my own scones. Thanks, Katie! And this means I can actually print my recipe, instead of worrying about copyright infringement (I hear Martha Stewart has great lawyers).


Fresh Strawberry Scones

Ingredients:
2 1/4 cup all purpose flour (plus a little extra for handling the dough)
1/4 c. granulated sugar
1 Tbsp raw or sanding sugar
1 Tbsp baking powder
1/4 tsp salt
1 stick (8 Tbsp) butter, chilled and cut into small pieces
1 egg
1/4 cup yogurt (I used plain Greek-style yogurt)
1/4 cup milk
1 tsp orange zest
1 pound fresh strawberries, diced (about 2 cups)

Directions:

-Preheat oven to 350 degrees and line baking sheet with parchment.

-In a small bowl, combine egg, yogurt, milk, and zest. Whisk to combine thoroughly and set aside.


-In a large bowl, combine flour, sugar, powder, salt, and whisk to combine.


-Using a pastry cutter or two knives, cut butter into flour until all pieces are smaller than pea-sized.


-Add diced strawberries, and toss to coat.


-Add wet ingredients to dry and mix in lightly with a fork until dough just comes together.

-Turn dough out onto well floured work surface and pat into large ball. If the dough is too sticky, you can add up to 1/4 cup of extra flour, 1 Tbsp at a time. I had to add about 1/8 cup extra.


-Cut the large ball of dough in half.

-Shape half of the dough into a flat disk shape and cut it into 6 slices using a sharp knife.


-Place individual scones on the baking sheet, one inch apart. Repeat with the other half of the dough.

-Sprinkle the tops of the scones with raw (sanding) sugar and place in the oven.

-Bake until scones turn slightly brown, about 25 minutes.

-Remove from the oven and let them cool on the baking sheet for 10 minutes.

-Transfer to a wire rack and let them cool for another 10-15 minutes.


Time to eat!


These scones were delicious! I will definitely be making homemade scones again. Yum yum yum! You could adapt this recipe to use any fresh berry.